skip to main |
skip to sidebar
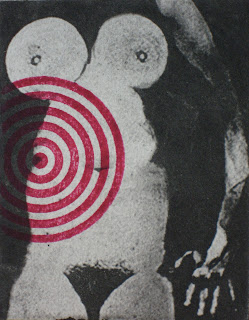 For the Green Door Exchange I created a small print based on a "body print". I used my own body as a matrix to create a one of a kind monotype. I began by inking my body with waterbased ink. Once I was sufficiently covered in ink, I pressed myself against a sheet of paper that I had laid out on the floor of my studio. This monotype was photographed and resized in Photoshop to meet the guidelines for the exchange. (The maximum paper size had to be 5.5"X5.5".) I then created a negative, exposed it to a photopolymer plate and inked and wiped the plate as an intaglio. A second plate was inked and printed as a relief over the first image to complete the print.
This was an interesting process and I already have plans to create a few more prints using this technique.
I've been away from the studio so there's not a lot happening art wise. I did however manage to complete the exchange print for Green Door IPE 2009 by running back and forth between the beach & my studio in the woods. This was the final exchange project I had committed to so I really wanted to get it sent out in time. Hopefully it will be in Great Britain by Sept 1st.
The exchanges I participated in were interesting. The deadlines were a great tool for keeping me focused and on task and they also required discipline to complete professional looking editions. On the negative side, I was often disappointed by the quality of the prints I received in return and have come to realize that this is more often the norm for exchanges. One never knows what you will get in return because the exchanges are open to professional as well as non-professional print makers. I eventually learned not to take the whole process too seriously and to just have fun with the guidelines presented for each exchange.
I'm still waiting to receive my exchange prints from Print Zero, Art House and the Littlest Print Exchanges and will post the prints I receive as they arrive.
 Trying to decide if I want to hit the image with a little watercolor or leave it as is. There is always something so "clean" about a black & white image; but on the other hand, a little experimentation never hurt. I may try it out on a proof and see where it goes.
 Six down and 49 to go. Trimming the prints to size.
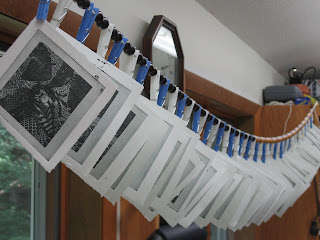
 Knowing that I was going to print 50 images, I decided that I needed an efficient drying system other than laying wet prints around the studio. Years ago I had made a drying "rack" from clothes pins and decided to redo that symple system. Over the weekend I gathered my supplies and easily threaded strong cord through clothes pins that conviently came with perfectly placed holes. I used some wooden beads as separators between the pins. I can easily move this drying system around to accomodate my needs.
 Spent the day editioning and made fantastic progress.
 I like using Akua waterbase ink and one of my favorite papers is Hahnemuhle-Copperplate, which doesn't need to be soaked too long.
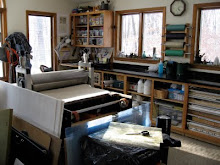
Here's my set up for paper preparation. I angle a sheet of plexiglass over a basic water soaking tray. Next to the tray I place a super absorbent, lint free towel. I remove the paper from the tray, place it against the plexiglass and use a window squeegee to remove excess water. I then lay the paper on the absorbent towel, cover it with another towel and roll the surface. This gives me perfectly dampened paper and eliminates the need for paper blotters. This works very well and the towels can be easily cleaned, washed and reused.
I have a collection of antique irons which come in very handy in the studio. Here I'm using them to hold the towel in place AND hold the rolling pin. They also come in handy as weights, to hold down paper when positioning multiple plates.
 Latest exchange project in the works. An edition of 50 due by September first means that I need to settle on an idea and follow through. The maximum paper size is 3.5" X 3.5" so I'm letting the image bleed off the edges.
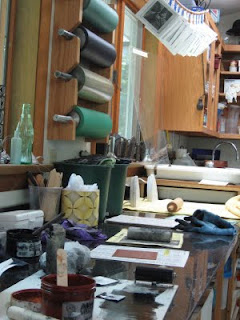
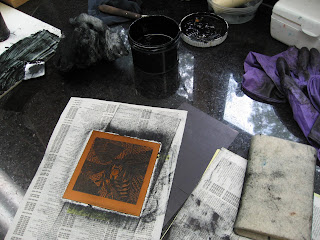
I used Photoshop to create an image based on scanned sketches and photographs. The Solarplate was first exposed to an aquatint screen and then the transparency. Here it is inked up. I use a felt wrapped block wrapped in phone book pages to wipe the plate. There is a piece of magnetic material taped to my work surface which holds the plate down. I find this really helpful, especially when the plate is so small.
 When I begin a piece I never know where it's heading and often it becomes something quite different than originally intended. I know that in my work the best pieces are the ones that just happen - ideas that were suddenly caught and that I hadn't anticipated. Sometimes when I play around with various images and sketches I reach a point where I begin to over work things and end up not pleased with the results. Also, if I keep playing around with an image I lose the freshness that I'm searching for; when this happens I find that I'm better off just putting the idea on the back burner for awhile.